Healing Low Back Pain with Yoga
This is excerpted from Yoga Therapy, Foundations, Methods, and Practices for Common Ailments.
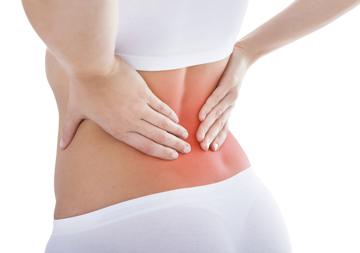
(Photos showing asana details are in the book only.)
Click here to order from Amazon.
The vertebral column (spine) generally consists of 33 vertebrae (rarely 32 or 34) arranged in five regions: cervical (C1–C7), thoracic (T1–T12), lumbar (L1–L5), sacral (S1–5), and coccygeal (four that are not ordinarily numbered). Although vertebrae in the sacral and coccygeal regions are fused, fibrocartilaginous intervertebral discs separate, bind, and provide shock absorption between all but two of the other twenty-four vertebrae—the atypical C1 and C2 (Atlas and Axis, respectively), with C1 resting on the facets of C2. Thus, the most superior disc is between C2 and C3, and the most inferior disc is between L5 and S1.
The varying shapes of the intervertebral discs give curvature to the spine. All have a common structure: the annulus fibrosus, several thin fibrocartilaginous layers that form an outer ring (thinner posteriorly) and that is bonded to the articular surfaces of the vertebral bodies, and the nucleus pulposus, an inner fibrogelatinous pulp that is the cushioning mechanism. The discs broaden when weighted. When excessively weighted, they can herniate or protrude in ways that press on nerve roots and cause pain. Due to the structure of the discs (the pulp is located relatively posteriorly where there is less ligamentous support), excessively strong spinal flexion (forward folding)— especially when combined with spinal rotation—is the leading cause of bulging and herniated discs placing pressure on nerve roots.
The intervertebral discs naturally and progressively degenerate across the lifespan, albeit differently depending on conditions discussed in the following text. They also degenerate and regenerate daily, losing height due to compressive loading forces during the day that expel fluid from the disc, then gaining height at low loading pressure as osmotic pressure imbibes fluid back into the disc. As a result we literally shrink and grow in height in every diurnal cycle (i.e., daily, which is why car drivers need to adjust their rear-view mirror every morning and night), while across the lifespan we shrink: every ninety-year- old is slightly shorter than when he or she was twenty-five years old.
These natural processes of disc degeneration combine with individual genetic endowments and lifestyle choices (and accidents) to determine the rate and extent of degenerative disc disease. Specific degenerative conditions vary, including the location and extent of disc space narrowing (stenosis), herniation, extent of end plate sclerosis, development of bone spurs, and the consequent narrowing of the foramina that places more pressure on nerve roots.
THE PAINFUL EXPERIENCE
There is a vast range of degenerative disc-related pain experiences. When symptomatic (often it is not), it is most often experienced as chronic low back pain that may or may not vary depending on position or activity (sitting, standing, walking, folding, etc.). Whereas low back pain is the most common, one can also experience chronic pain in the neck. Pressure on sciatic nerve roots can cause tingling and pain through the buttocks, thighs, and lower legs. The degree of pain varies from very mild to debilitating.
THE KNOWN CAUSE
The primary cause of intervertebral disc degeneration is the relationship between disc structure and force on the disc. Age is the leading factor in loss of disc fluid. Repetitive and excessive spinal movement, obesity, repetitive heavy lifting, acute injury, and smoking cigarettes exacerbate natural disc degeneration.
HOW IT HEALS
Conventional medical practices call for progressive treatments, starting with ice or heat in combination with anti-inflammatory medications, physical therapy, and surgery that ranges from removal of a damaged disc to spinal fusion to placement of an artificial disc. There is growing interest in biological treatment approaches in which various cell therapy techniques show promise in reversing disc degeneration, including protein injection, gene therapy, and platelet-rich plasma cocktails.
HEALING WITH ASANA PRACTICES
The general asana strategy for degenerative disc disease is to develop the balance in muscular strength and flexibility that supports healthy posture, this in conjunction with neuromuscular re-education that refines the use of muscles that affect pressure in and around the spine. It is important to understand that while current research shows promise for biological treatments with the potential to reverse certain degenerative conditions, at present we must proceed with the awareness that there is not a cure for disc degeneration. Here we offer postural practices that focus on healthy postures and help to reduce compressive pressure in the spine due to disc degeneration. The suggestions offered here are informed in part by the patient-centered self-help- oriented treatment methods developed by Robert McKenzie and known in physical therapy as the McKenzie Protocol or McKenzie exercises. We also draw from the Alexander Technique.
Establishing an Inner Foundation
UTKATASANA (CHAIR POSE) MODIFIED
Begin sitting in a chair the height of which allows the thighs to be level and the feet firmly placed on the floor hip-distance apart. With the hands on the hips, rotate the pelvis forward and back to find where it feels like the weight of the body is centered very slightly to the front of the sitting bones. This establishes a level pelvis and will help in positioning the spine in its natural form. With the fingers placed on the lowest front ribs, alternately press the ribs into and away from the fingers to find where it feels like they are in their natural place. Elevate the shoulders toward the ears, draw them back, and then draw the shoulders lightly down against the back ribs. Rest the hands comfortably on the thighs. Position the head level, where it feels like it is effortlessly floating on top of the spine. The spine is now in (or close to) its natural form (all conditions notwithstanding, particularly pathological ones that affect spinal posture).
Changing as little as possible, root the sitting bones firmly into the seat of the chair. Breathing slowly and fully in and slowly and completely out, feel the natural ways the body moves through the cycles of breath. Focusing on keeping the spine in its neutral and natural alignment, with each inhalation consciously extend taller while minimizing disturbance to the form of the spine. With the completion of each exhalation, feel how the abdominal muscles lightly engage and girdle in toward the spine; without squeezing the belly, try to maintain this light abdominal muscular engagement while next inhaling and while maintaining the position of the pelvis, spine, shoulder girdle, and head. Stay with this practice for up to five minutes. With the completion of the exhalations, explore holding the breath out for two to ten seconds while more strongly engaging the abdominal muscles. Be sure to let the abdominal muscles slightly soften before inhaling.
TADASANA (MOUNTAIN POSE)
Begin with the cultivation of pada bandha described on page 107. With pada bandha active, firm the quadriceps while pressing the femurs back (try to point the kneecaps straight forward). Rotate the pelvis forward and back to find where it feels level (use the prior practice of Utkatasana to get a better feeling for this.) With the fingers placed on the lowest front ribs, alternately press the ribs into and away from the fingers to find where it feels like they are in their natural place. Elevate the shoulders toward the ears, draw them back, and then draw the shoulders lightly down against the back ribs. Relax the arms down by the sides of the thighs or hips. Position the head level, where it feels like it is effortlessly floating on top of the spine with the ears aligned with the shoulders. The spine is now in (or close to) its natural form (all conditions notwithstanding, particularly pathological ones that affect spinal posture). With pelvic neutrality, the spine will come into its natural curvature (neutral extension), unless there is significant muscular imbalance or a pathological condition such as scoliosis or kyphosis.
Breathing slowly and fully in and slowly and completely out, feel the natural ways the body moves through the cycles of breath. Focusing on keeping the spine in its neutral and natural alignment, with each inhalation consciously extend taller with a feeling of the crown of the head reaching up while minimizing disturbance to the form of the spine. With the completion of each exhalation, feel how the abdominal muscles lightly engage and girdle in toward the spine; without squeezing the belly, try to maintain this light abdominal muscular engagement while next inhaling and while maintaining the position of the pelvis, spine, shoulder girdle, and head. Stay with this practice for up to two minutes. With the completion of the exhalations, explore holding the breath out for two to ten seconds while more strongly engaging the abdominal muscles. Be sure to let the abdominal muscles slightly soften before inhaling.
SETU BANDHA SARVANGHASANA (BRIDGE POSE) PREP—LOW BACK PRACTICE 1
Here we take the preparatory form of Bridge Pose to explore the connection between breathing and developing muscular support for a neutral lumbar spine. Lying supine with the feet positioned by the hips hip-distance apart, slide one hand under the low back area. Rotate the pelvis to create just enough space for the hand. With each exhalation, feel how the abdominal muscles engage and cause the low back to press toward the floor. Rather than allowing the spine to change form with the exhalations, focus on maintaining the neutral position of the pelvis in relation to the low back and try to maintain the natural lumbar curve. With the completion of each exhalation, hold the breath out for up to five seconds while more firmly engaging the abdominal muscles that naturally contract when exhaling out the breath. This practice will help to train the abdominal muscles to contract in support of a healthy natural spinal form.
SETU BANDHA SARVANGHASANA (BRIDGE POSE) PREP—LOW BACK PRACTICE 2
Building on Low Back Practice 1, on each exhalation try to draw one knee in toward the same side shoulder without disturbing the natural form of the spine (keep the normal lumbar curve). Then try to draw in both knees at the same time without affecting the spine.
SETU BANDHA SARVANGHASANA (BRIDGE POSE) PREP—LOW BACK PRACTICE 3
Building on Low Back Practice 1, place a strap around one foot, extend that leg toward the sky, and alternately bend and straighten the knee of that leg to stretch the hamstrings without disturbing the neutral position of the spine and pelvis.
SALABHASANA A (LOCUST POSE) DYNAMIC STRENGTHENING PRACTICE 1
Lying prone with the arms on the floor along the sides of the body and the legs together, firmly press the feet down to awaken the legs while pressing the tailbone slightly toward the heels. With the inhalation, very slowly and slightly lift the chest and head off the floor while maintaining the natural shape of the neck (do not try to lift the ears higher than the shoulders). With the exhalation very slowly release the chest and head to the floor. Take a few breaths to rest and completely relax, then repeat several times. Explore lifting slightly higher each time. Move very slowly to move more consciously (especially with greater conscious awareness of sensation in the low back). Slow movements will also help to establish more refined neuromuscular action in this movement and thus help develop better muscular support for the lumbar spine.
SALABHASANA A (LOCUST POSE) DYNAMIC STRENGTHENING PRACTICE 2
Explore doing the Dynamic Strengthening Practice 1 while lifting the legs and torso simultaneously. Focus on keeping space and comfort in the low back by pressing the tailbone toward the heels and extending long through the legs with a feeling of sending energy out through the toes. This practice adds strength to the hamstrings, which helps to keep the pelvis from excessive anterior rotation.
BIDALASANA (CAT POSE) WITH SPINAL BALANCING
On all fours, first move the pelvis forward and back several times while alternately moving the spine into extension and flexion (cat/cow movements). Then extend the healing leg straight back with the toes curled under on the floor. If comfortable in the low back, slowly lift and lower the extended leg up to twenty-five times, holding for five to ten breaths on the last lift. Repeat on the other side with the other leg. Again extend the healing leg back while reaching the arm on the opposite side forward (turn the palm of that hand toward center to create space around the neck and stabilize the shoulder). While stretching the fingers and toes of the lifted limbs away from each other, slowly abduct those limbs out only so far as possible while keeping the hips and upper back level with the floor before returning to a neutral position. Be very sensitive to the low back, neck, and wrist of the grounding hand. Repeat up to twenty-five times and hold in abduction for five to ten breaths. Rest in Balasana, allowing the low back to slightly round. If this basic form of Child’s Pose causes strong stretching or discomfort in the low back (or knees), separate the knees slightly wider than hip-distance apart so there is less pressure in the low back.
SUPTA PADANGUSTHASANA (RECLINED BIG TOE POSE)
Lying supine with a strap looped around the foot, clasp the strap and extend the leg straight up from the hip. Keep the opposite hip grounded to the floor. Maintaining slight tension in the strap, slowly bend and straighten the lifted leg several times while keeping the pelvis and low back stable (keep the natural lumbar curve). Focus on gently stretching the hamstrings. After several of these repetitive movements, hold at about an 80 percent stretch for up to one minute.
EKA PADA RAJAKAPOTASANA PREP (ONE-LEGGED KING PIGEON POSE PREP)
Begin lying supine with the feet placed on the floor as for Setu Bandha Sarvanghasana. Cross the ankle of the right leg to the opposite knee, keeping the ankle joint in dorsiflexion. Clasp behind the knee and pull it toward the shoulder on that same side of the body while keeping the tailbone on the floor (maintain a neutral pelvis and a natural lumbar curve). After several of these repetitive movements, hold at about an 80 percent stretch for up to two minutes.
ANJANEYASANA (LOW LUNGE POSE)
From Tadasana, step one foot back about one leg length and release that knee to the floor. Position the torso upright and place the hands on the hips to assist in positioning the pelvis neutrally (where it feels level). Keep the hands on the hips with the thumbs pointing down near the SI joints. While slowly bending the front knee, use the hands to keep the pelvis from rotating forward. Unless one has acute knee issues, it is okay to let the knee travel beyond the heel, which will allow a deeper stretch in the hip flexors. Be more interested in keeping the pelvis level than in deepening the lunge. Inhaling, back away from the lunge, exhaling, lunge more deeply, moving repetitively in this way five to ten times before holding a comfortably deep lunge position for up to one minute. Do both sides equally.
BALASANA (CHILD’S POSE) VARIATION
Begin in Balasana. Rather than folding forward over both thighs, fold obliquely forward over the right thigh while reaching the left arm forward from the shoulder. Play with alternately arching the left lower back up and then back down while stretching out longer through the left arm and hand. Explore both sides for one to two minutes.
SUPTA PARIVARTANASANA(RECLINED REVOLVED POSE)
Laying supine, clasp around the knee of the healing side to flex the hip, then draw that knee across the body, coming into the basic spinal twisting form of Supta Parivartanasana. With a strap looped around the foot of the crossed over leg, fully extend the knee of that leg while continuing to draw the leg across the body. Hold for two minutes. Explore on both sides.
PARIVRTTA JANU SIRSASANA (REVOLVED HEAD-TO- KNEE POSE) VARIATIONS
Start sitting upright with the legs positioned in the basic form for Parivrtta Janu Sirsasana with the left knee flexed and right leg fully extended. Twist to align the sternum with the bent left knee. While maintaining maximum length in the low back, extend the torso to the right (over the straight leg) while reaching the left arm straight up from the shoulder (in flexion and external rotation). While keeping the left sitting bone firmly rooted to the floor, explore very slightly and sensitively turning the torso toward the floor while stretching from the back of the left hip through the left fingertips. Explore on both sides for up to two minutes.
DWI CHAKRA VAHANASANA (YOGIC BICYCLES)
From Apanasana, interlace the fingers and cup the head in the hands. With the exhalation, curl the torso up, drawing the elbows toward the knees while extending the right leg straight out about one foot off the floor and extending the right arm out over the right leg. Complete the exhalation while drawing the right arm across the left knee and drawing the elbows together. Inhaling, release down, drawing the knees toward the chest and head and elbows to the floor. Move slowly and work as low, deep, and broadly through the belly as possible. Be more interested in moving slowly yet steadily rather than seeing how many you can do with a timed sequence. Move with the breath. Repeat on the other side, continuing for one to three minutes.
PELVIC TILTS
From Apanasana, extend the legs straight up, interlace the fingers, and cup the head in the hands. Keeping the legs vertical, on the exhalation draw the elbows toward the knees without changing the position of the legs. Keeping the upper back and shoulders lifted, with each exhale very slowly and smoothly curl the tailbone up, releasing it down as the breath flows out. Be more interested in slow and smooth movement than in maximizing the pelvic tilt by jerking the tailbone up. Repeat five to twenty-five times.
JATHARA PARIVARTANASANA (REVOLVING TWIST POSE)
The basic form of this asana can be either a held twist (Supta Parivartanasana) or an abdominal core strengthening movement. With the arms extended out like a cross and palms pressing down, alternately move the legs (or bent knees) back and forth to the left and right while gazing in the opposite direction of the legs, keeping the knees or legs from touching the floor. Inhaling, extend the legs over; exhaling, draw them back up to center.